Solomon Bar Rope Cuffs (Race Bannon Style)
by Rope Fashions

These wrist and ankle cuffs have the feel of rope, but the convenience of leather restraints. Race Bannon, of San Francisco, used to publish a brochure on
making them, which is where I first learned about them.
Slowly applying layer upon layer of rope to someone can be very erotic. But sometimes you just want to restrain them quickly. These restraints are as quick to
apply as leather cuffs, but are much less expensive, and are completely adjustable.
They are just the thing for when you are out of town and you realize you forgot your cuffs. Just go down to the hardware store and get some rope, and some
electrical tape for the ends, and in half an hour you can make yourself a set of cuffs.
They are also excellent for air travel, since they don't look suspicious when your baggage is X-rayed.
|
Step 1:
For each cuff, you will need two ropes. The lengths aren't all that critical, but 11 feet for the main rope (shown here in black) and five feet for the cross
rope (shown here in red) is about right.
Take the main rope and double it. Take the cross rope, and tie an overhand knot in the middle, around the doubled main rope. Leave a little bit of a loop
of main rope sticking out of the knot.
|
|
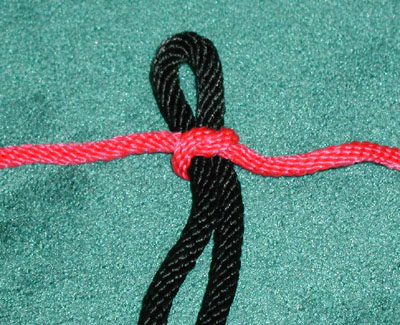
Step 2:
Cross the right end of the cross rope from right to left over the main rope.
|
|
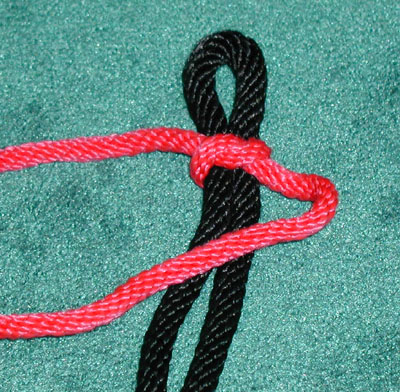
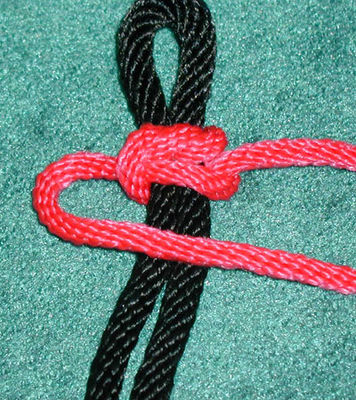
Step 3:
Now cross the left end of the cross rope from left to right under the main rope, and stick the end through the loop that was formed in the previous step.
|
|
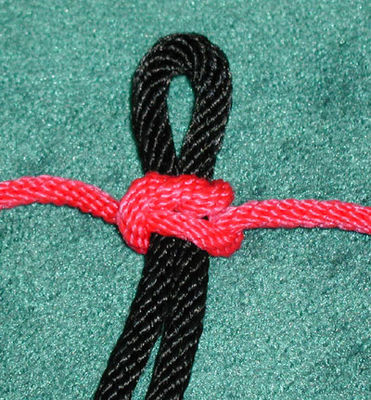
Step 4:
Pull the ends of the cross rope tight. You have just tied a square knot around the main rope.
|
|
Step 5:
Now cross the left end of the cross rope over the main rope from left to right.
|
|
Step 6:
Cross the right end of the cross rope under the main rope from right to left, and stick the end through the loop you formed in the previous step.
|
|
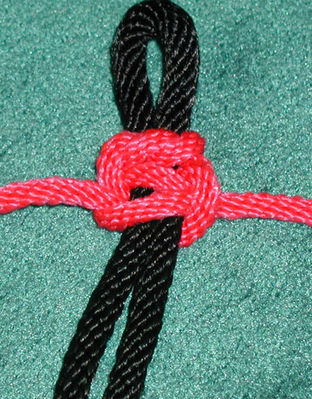
Step 7:
Pull the ends tight.
|

|
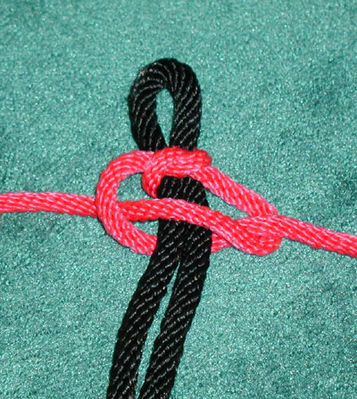
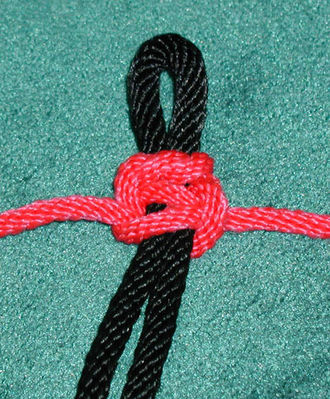
Step 8:
Continue making square knots, alternating the left-to-right, right-to-left and right-to-left, left-to-right pattern. If you get confused about where you are in the
sequence, just look at the loops; one end of the cross rope has loops that stay on top of the rope, and the other end has loops that stay under the rope. Just make
sure you continue that pattern, and you will be OK.
|
|
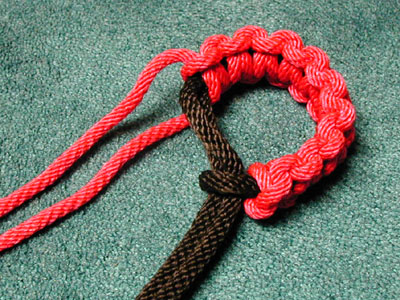
Step 9:
Keep tying square knots until you have enough to go around the wrist or ankle. Take the ends of the main rope and run them through the loop in the main rope.
The square knots should completely surround the wrist or ankle, and the restraint should be snug, but not tight. If it is too snug, add some more square knots.
If it is too loose, take some away.
|
|
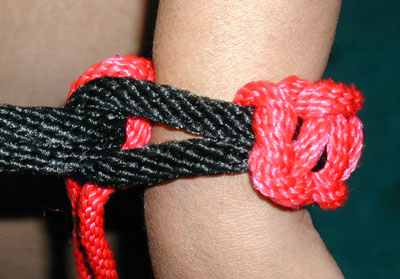
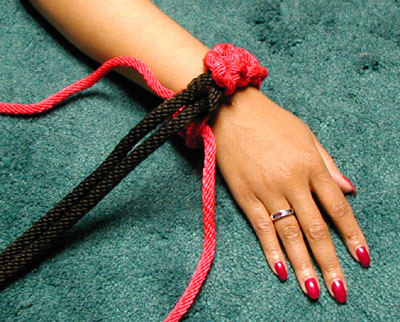
Step 10:
Here is how the restraint looks on the wrist.
|
|
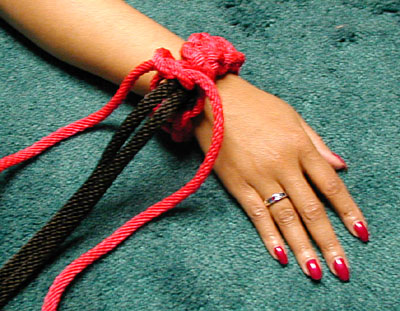
Step 11:
Now take the ends of the cross rope, and tie a square knot over the loop, locking it in place. Tie the ends of the main rope to something, and your partner
is restrained.
|
|
Step 12:
When you're done playing, just untie the knot around the loop, get some slack in the main rope, and slide the restraint off the wrist or ankle. You can keep
it like this, ready for next time you want to play.
Tying It All Together has a video on YouTube that demonstrates how to tie a decorative, non-kinky, Solomon bar. You might take a look at it to see the how
the basic knots are tied. The video is here.
|
|


 Articles and Info
 Books
Books Contact
Us
Contact
Us Humor
Pages
Humor
Pages Links
Links Stories
 Training
 Welcome
Page
Welcome
Page