These wrist and ankle cuffs have the feel of rope, but the convenience of leather restraints. They are based on a knot called a Solomon bar. I first learned about
Solomon bar cuffs from a brochure published by Race Bannon, of San Francisco.
The cuffs shown here are a variation on the original design. Instead of using one 11-foot rope and one five-foot rope per cuff, this design makes each cuff out of a
single 20-foot length of rope.
They are just the thing for when you are out of town and you realize you forgot your cuffs. Just go down to the hardware store and buy 80 feet of rope, and
some electrical tape for the ends, and in half an hour you can make yourself a set of cuffs.
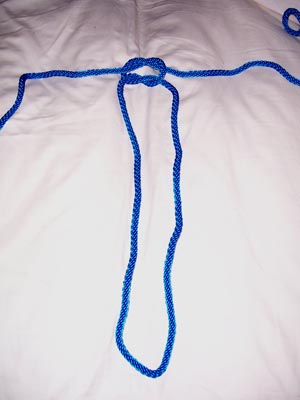
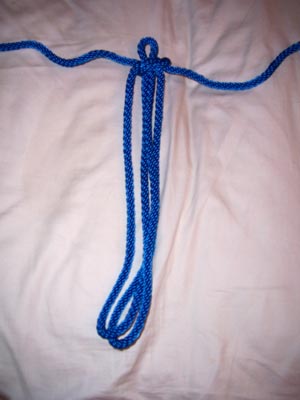
 Step 1:
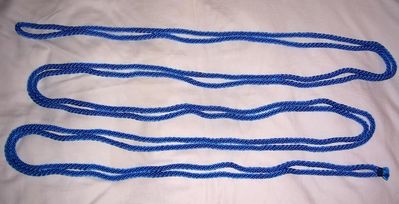
We begin by taking a 20-foot length of rope and doubling it. We are using 5/16-inch rope; you don't want to use too large a diameter.
Step 1:
We begin by taking a 20-foot length of rope and doubling it. We are using 5/16-inch rope; you don't want to use too large a diameter.
|
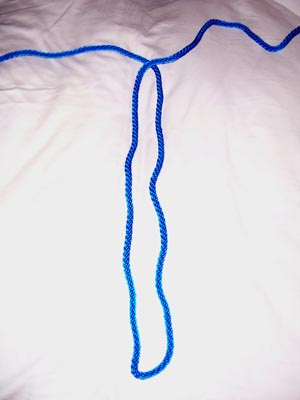 Step 2:
About three feet from the doubled end of the rope, cross one end of the rope over the other, to begin a square knot.
Step 2:
About three feet from the doubled end of the rope, cross one end of the rope over the other, to begin a square knot.
|
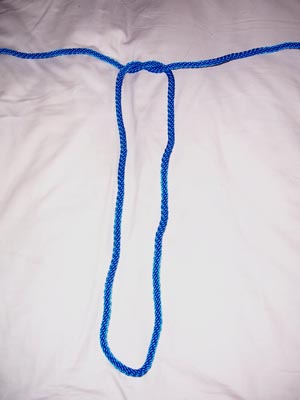 Step 3:
Take the end underneath the rope it just went over, so the two ropes are twisted together.
Step 3:
Take the end underneath the rope it just went over, so the two ropes are twisted together.
|
 Step 4:
Now repeat the last two steps, starting with the opposite side, to make a square knot.
Step 4:
Now repeat the last two steps, starting with the opposite side, to make a square knot.
|
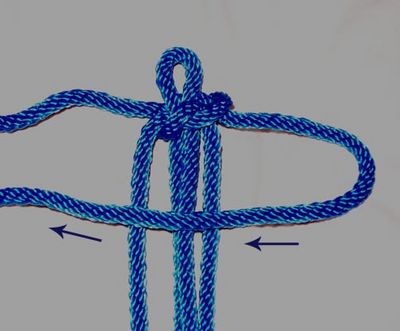
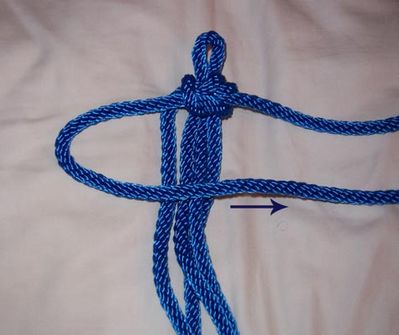
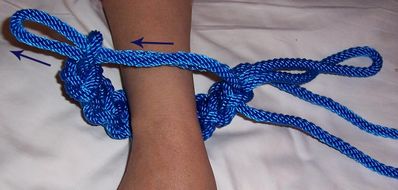
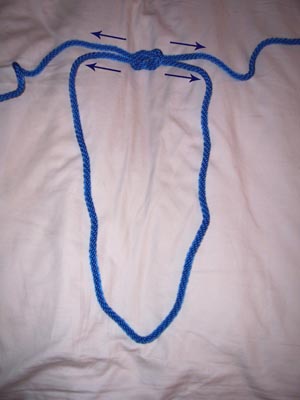 Step 5:
When you tighten the knot, pull the two ropes on each side together, as shown by the arrows. Otherwise, the knot will slide along the ropes.
Step 5:
When you tighten the knot, pull the two ropes on each side together, as shown by the arrows. Otherwise, the knot will slide along the ropes.
|
 Step 6:
Now take the doubled end of the rope, fold it over on itself, and push the end through the middle of the square knot you just made, leaving a little loop
sticking through.
Step 6:
Now take the doubled end of the rope, fold it over on itself, and push the end through the middle of the square knot you just made, leaving a little loop
sticking through.
|
 Step 7:
Pull the square knot tight, again making sure to pull the two ropes on each side together, to keep the knot from sliding.
Step 7:
Pull the square knot tight, again making sure to pull the two ropes on each side together, to keep the knot from sliding.
|
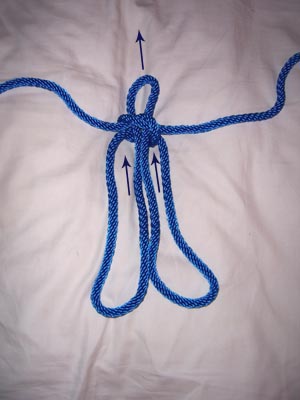
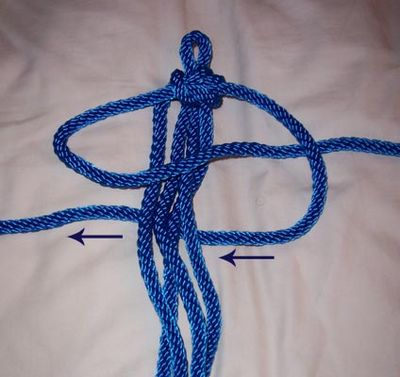
 Step 8:
You should now have two large loops below the knot, and one small loop above the knot. Gather the large loops together, so that all the ropes are parallel.
Step 8:
You should now have two large loops below the knot, and one small loop above the knot. Gather the large loops together, so that all the ropes are parallel.
|
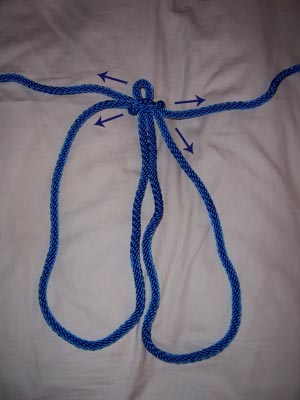
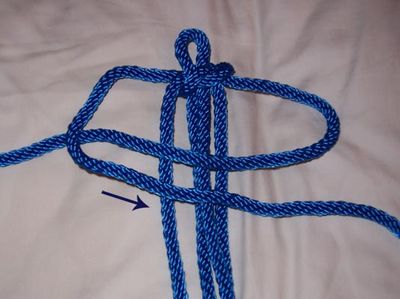
 Step 9:
You should have two ropes sticking out to the sides. Take the right-hand one and cross it over to the left, crossing over the loops you just gathered up.
Step 9:
You should have two ropes sticking out to the sides. Take the right-hand one and cross it over to the left, crossing over the loops you just gathered up.
|
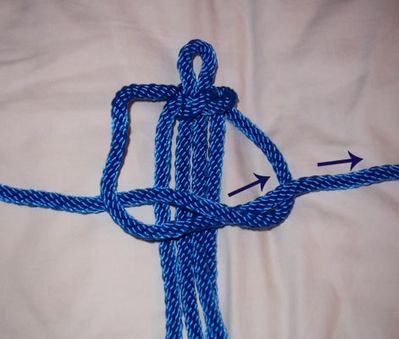
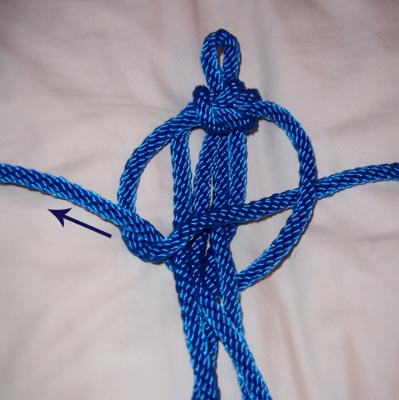
 Step 10:
Now take the left hand rope and cross it over to the right, going over the rope from the previous step, as well as the gathered loop ropes.
Step 10:
Now take the left hand rope and cross it over to the right, going over the rope from the previous step, as well as the gathered loop ropes.
|
 Step 11:
Take the end of the rope under the rope that you crossed from right to left two steps ago. Bring it out through the loop and pull it tight.
Step 11:
Take the end of the rope under the rope that you crossed from right to left two steps ago. Bring it out through the loop and pull it tight.
|
 Step 12:
You have just tied a square knot around the gathered loop ropes.
Step 12:
You have just tied a square knot around the gathered loop ropes.
To make the next knot, take the left-hand rope (the opposite one from what you started with on the previous knot) and cross it over the gathered
loop ropes, from left to right.
|
 Step 13:
Take the right-hand rope, cross it over the rope from the previous step, then cross it under the gathered loop ropes.
Step 13:
Take the right-hand rope, cross it over the rope from the previous step, then cross it under the gathered loop ropes.
|
 Step 14:
Take the end of the rope up through the loop from two steps back, and pull the knot snug. This completes your second square knot.
Step 14:
Take the end of the rope up through the loop from two steps back, and pull the knot snug. This completes your second square knot.
|
 Step 15:
Now take the right-hand rope and cross it over the gathered loop ropes, just like you did for the first square knot.
Step 15:
Now take the right-hand rope and cross it over the gathered loop ropes, just like you did for the first square knot.
|
 Step 16:
Continue this process of making square knots, alternating between starting on the left and starting on the right. If you get confused as to where you are, look
at the pattern that the ropes make. One will seem to be zig-zagging on the top and one will be doing the same on the bottom. If you look at the pattern you can
easily see if you have forgotten to alternate the sides.
Step 16:
Continue this process of making square knots, alternating between starting on the left and starting on the right. If you get confused as to where you are, look
at the pattern that the ropes make. One will seem to be zig-zagging on the top and one will be doing the same on the bottom. If you look at the pattern you can
easily see if you have forgotten to alternate the sides.
Keep making square knots until the you have almost enough to go around the wrist or ankle.
|
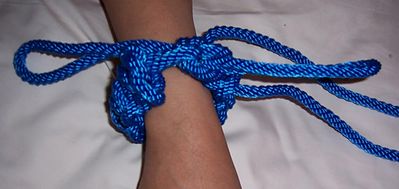
 Step 17:
Lay the wrist or ankle on top of the cuff. Notice that you have a small loop on one end, and two larger loops on the other.
Step 17:
Lay the wrist or ankle on top of the cuff. Notice that you have a small loop on one end, and two larger loops on the other.
|
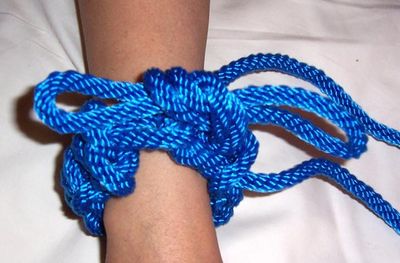
 Step 18:
Now make a square knot with the two loops. Left over right...
Step 18:
Now make a square knot with the two loops. Left over right...
|
 Step 19:
and right over left.
Step 19:
and right over left.
|
 Step 20:
If the cuff is too loose, untie the loops, then remove one or two square knots from the body of the cuff. If it is too tight, add one or two square knots. One
of the beauties of this cuff is that it is completely adjustable.
Step 20:
If the cuff is too loose, untie the loops, then remove one or two square knots from the body of the cuff. If it is too tight, add one or two square knots. One
of the beauties of this cuff is that it is completely adjustable.
|
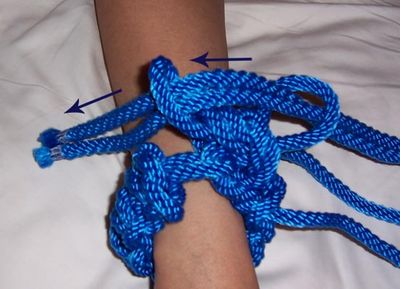 Step 21:
Take the ends of the ropes, and run them through the two loops. This will keep your captive from untying the cuff.
Step 21:
Take the ends of the ropes, and run them through the two loops. This will keep your captive from untying the cuff.
|
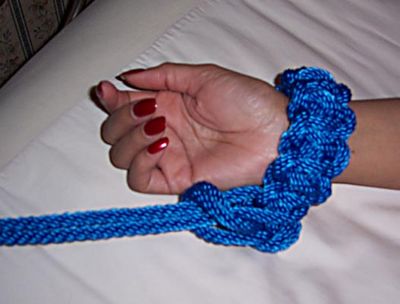
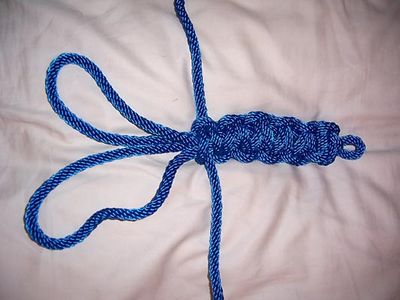
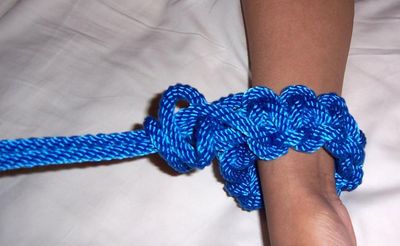 Step 22:
Here is the final result. I hope you enjoy using it as much as I do.
Step 22:
Here is the final result. I hope you enjoy using it as much as I do.
Tying It All Together has a video on YouTube that demonstrates how to tie a decorative, non-kinky, Solomon bar. You might take a look at it to see the how
the basic knots are tied.
|


 Articles and Info
 Books
Books Contact
Us
Contact
Us Humor
Pages
Humor
Pages Links
Links Stories
 Training
 Welcome
Page
Welcome
Page