Chained Stitched Collar
by Rope Fashions

Have you ever been someplace, and everyone else has their submissives on leashes, and your submissive doesn't have her collar with her? Or maybe you a playing with a new
submissive, and want them to feel the joy of being leashed, but you don't have a spare collar with you. Or maybe you'd just like to use rope for everything you do.
Here is a way to make a quick collar and leash, using just a single length of rope. The collar will not tighten when you pull on the leash, which makes it safer, and it
is thick enough that it will not cut into your partner's neck. Since it takes a few minutes to remove it, you should make sure you have EMT shears with you, in case it
turns out that you made it too tight, and you need to quickly remove it.
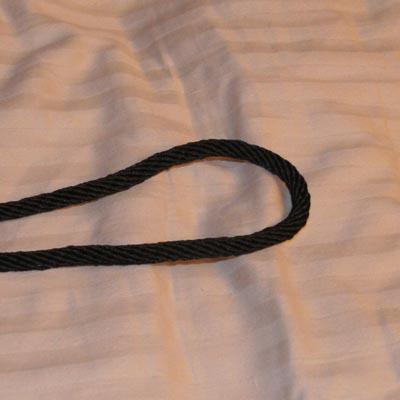 Step 1:
Take a 25-foot length of rope, and double it. We will be working with the bight (doubled) end.
Step 1:
Take a 25-foot length of rope, and double it. We will be working with the bight (doubled) end.
|
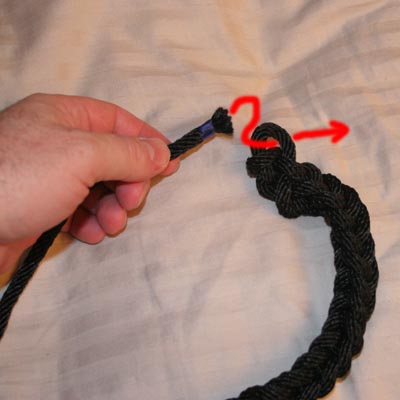
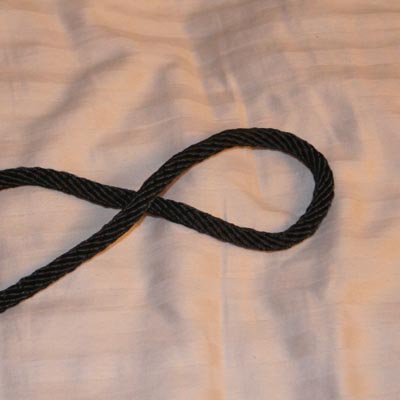 Step 2:
Twist the loop. It doesn't matter which way you twist it.
Step 2:
Twist the loop. It doesn't matter which way you twist it.
|
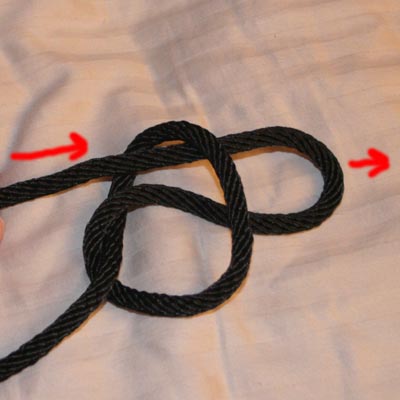
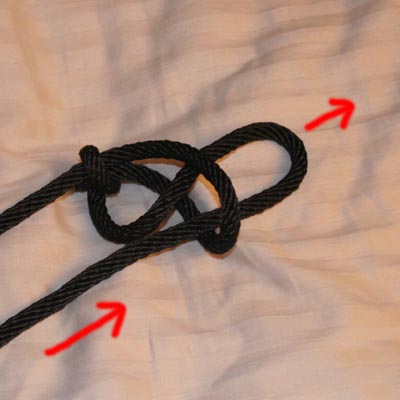
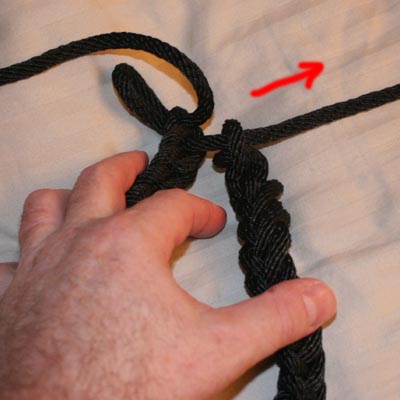
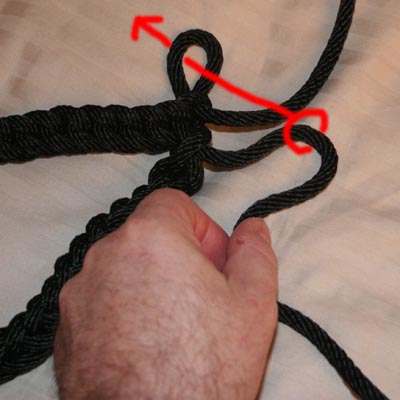
 Step 3:
If you look where the two rope ends cross, one of them goes underneath the other one. Take that end and fold it to make another bight. This bight is going
to go through the loop we made when we twisted the first bight.
Step 3:
If you look where the two rope ends cross, one of them goes underneath the other one. Take that end and fold it to make another bight. This bight is going
to go through the loop we made when we twisted the first bight.
|
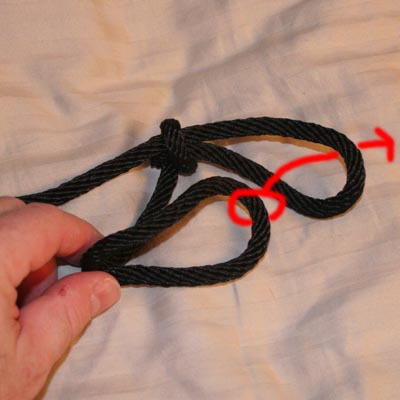
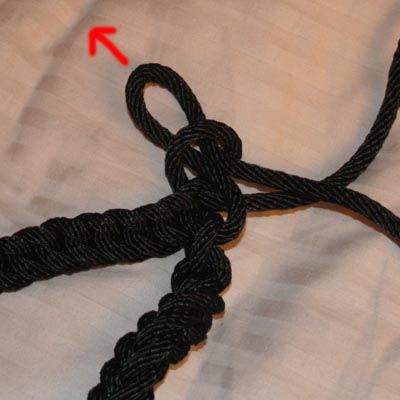
 Step 4:
Push the bight through...
Step 4:
Push the bight through...
|
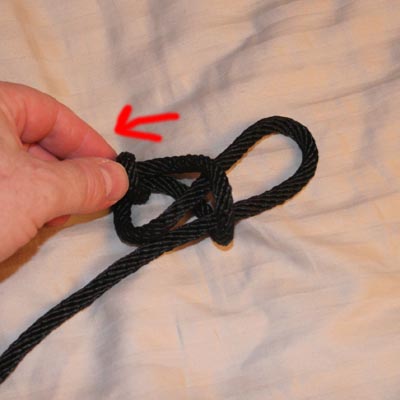
 Step 5:
Then pull on the other end to tighten things up.
Step 5:
Then pull on the other end to tighten things up.
|
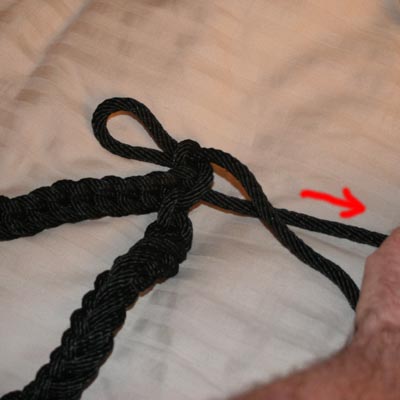
 Step 6:
Now take the end that you just pulled on, and double it to form a bight. This is going to go through the loop we just made.
Step 6:
Now take the end that you just pulled on, and double it to form a bight. This is going to go through the loop we just made.
|
 Step 7:
Like this...
Step 7:
Like this...
|
 Step 8:
Then we pull on the other end...
Step 8:
Then we pull on the other end...
|
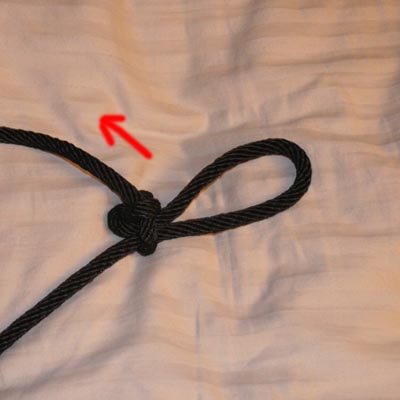 Step 9:
And tighten things up. Keep repeating this procedure. If you ever get confused about where you are, here is how to get your bearings. There are two ends. One
connects to the current loop, and if you push or pull it, the loop will get larger or smaller. The other end, the one that is connected to a knot, is the one
we double to make a new bight.
Step 9:
And tighten things up. Keep repeating this procedure. If you ever get confused about where you are, here is how to get your bearings. There are two ends. One
connects to the current loop, and if you push or pull it, the loop will get larger or smaller. The other end, the one that is connected to a knot, is the one
we double to make a new bight.
|
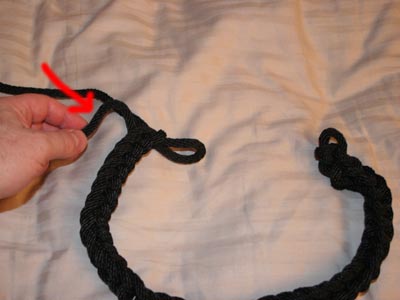
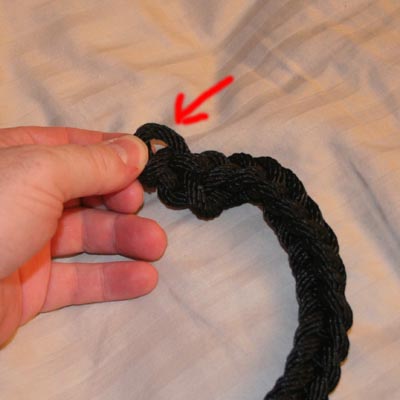 Step 10:
When you have chain-stitched enough for the collar to go around your partner's neck comfortably, find the orginal loop at the beginning of the collar, and pull it
out a little bit.
Step 10:
When you have chain-stitched enough for the collar to go around your partner's neck comfortably, find the orginal loop at the beginning of the collar, and pull it
out a little bit.
|
 >
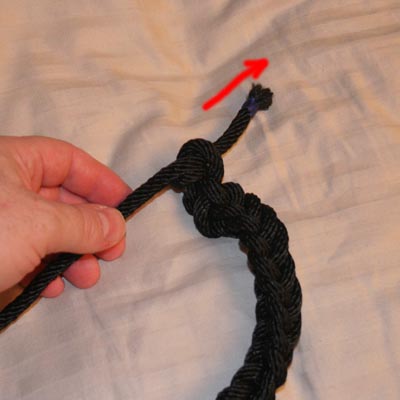
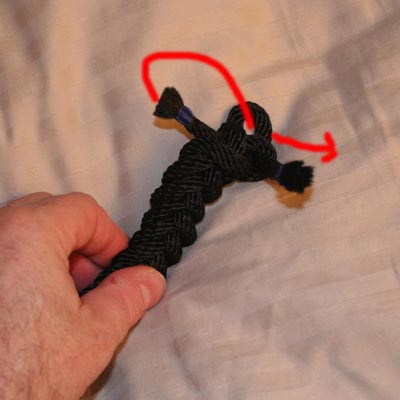
Step 11:
If you look at the two ends you have, one of them is connected to the loop, and the other one is the one that will make the next bight. Before it does so,
we are going to run it through the original loop at the beginning of the collar. >
Step 11:
If you look at the two ends you have, one of them is connected to the loop, and the other one is the one that will make the next bight. Before it does so,
we are going to run it through the original loop at the beginning of the collar.
|
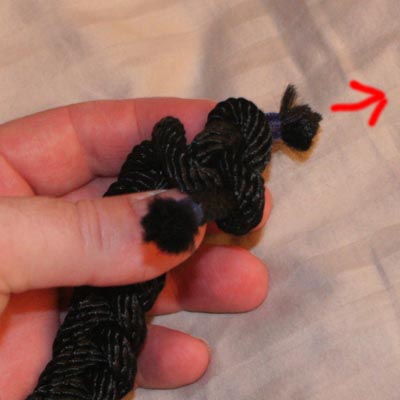
 Step 12:
So push the end through the loop...
Step 12:
So push the end through the loop...
|
 Step 13:
And pull the rope through. At this time, you should put the collar around your partner's neck.
Step 13:
And pull the rope through. At this time, you should put the collar around your partner's neck.
|
 Step 14:
And keep pulling on the end until the ends of the collar are together.
Step 14:
And keep pulling on the end until the ends of the collar are together.
|
 Step 15:
Now, before you let go of that rope, make a new bight with it and push it through the loop.
Step 15:
Now, before you let go of that rope, make a new bight with it and push it through the loop.
|
 Step 16:
Like this.
Step 16:
Like this.
|
 Step 17:
And pull on the other rope to tighten things up. In other words, we are back to the same routine we were doing before.
Step 17:
And pull on the other rope to tighten things up. In other words, we are back to the same routine we were doing before.
|
 Step 18:
Here's how the collar looks after a few more stitches.
Step 18:
Here's how the collar looks after a few more stitches.
|
 Step 19:
Eventually, your rope end will get too short to make any more bights. Take the short end and push it through the the last loop you made.
Step 19:
Eventually, your rope end will get too short to make any more bights. Take the short end and push it through the the last loop you made.
|
 Step 20:
Pull it tight, and you're done.
Step 20:
Pull it tight, and you're done.
|
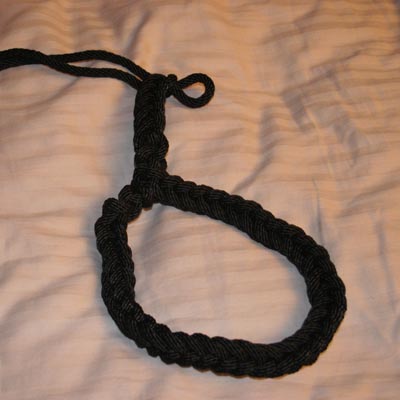
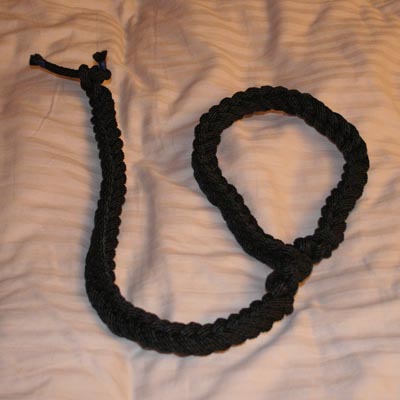 Step 21:
Here is what the completed collar looks like.
Step 21:
Here is what the completed collar looks like.
|
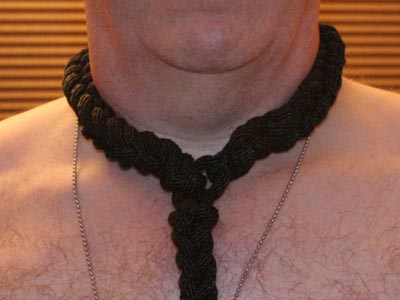 Step 22:
And here is what it looks like on.
Step 22:
And here is what it looks like on.
|
|


 Articles and Info
 Books
Books Contact
Us
Contact
Us Humor
Pages
Humor
Pages Links
Links Stories
 Training
 Welcome
Page
Welcome
Page