|
|
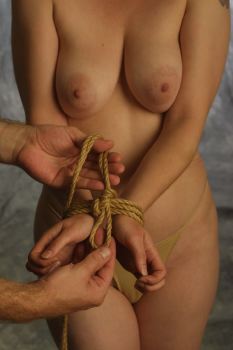
The Wrist Tie
by Japan Rope

|
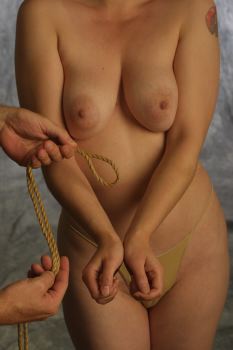
Step 1
Here it is, the single biggest secret to Japanese style rope bondage -- no, it's not the beautiful girl (or guy.) It's the loop. Double your rope,
creating a loop in the very center. If you're working with a 10m length, as we are here, this will give you a doubled piece of rope approximately 5m
(about 15ft) to work with. This "knot" is often called a lark's head - though it really isn't unless you then pass the working end(s) through
the bight (the looped part) after it's been passed through a ring, or around a pole. Think of luggage tags, and you get the picture.
|
|
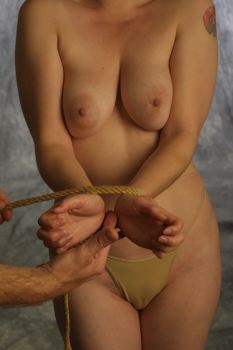
Step 2
Have your subject place their wrists together, and start wrapping with the working end of the rope. The looped end here is in the left hand, and the
working end in the right.
Note: it doesn't really matter which end you wrap with, but one advantage of doing it this way is that you can measure out how much of the "bight"
end is left over. This helps leave you with a knot with a loop later that is just the right size. This extra bit of careful tying doesn't make a whit of
difference with this basic tie, but when you build more complex ones from this ... it will.
|
|
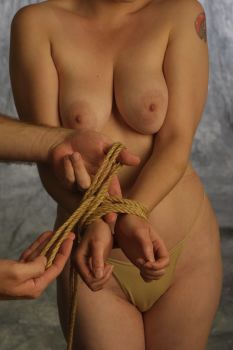
Step 3
After wrapping the working end around the wrists two or three times, catch the final turn with the looped bight.
|
|
Step 4
Next, take the bight underneath the turns above the wrists.
|
|
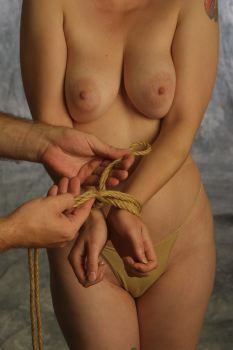
Step 5
A simple knot completes the process. With hemp, this will hold without problem - with a synthetic rope, you might have to tie a square knot.
|
|

Step 6
Here's our finished project. There are actually many different ways to do this basic tie -- and no absolutely right way to do it.
|
|


 Articles and Info
 Books
Books Contact
Us
Contact
Us Humor
Pages
Humor
Pages Links
Links Stories
 Training
 Welcome
Page
Welcome
Page