jquery slideshow by WOWSlider.com v8.7


Kani, forced bowby Japan RopeArtist: Bridgett HarringtonModel: DeLano N. Distress |
|
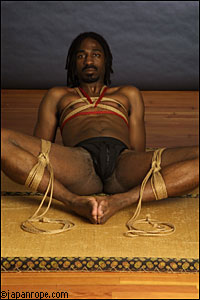
Step 1:
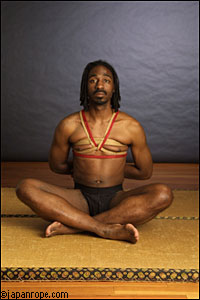
Begin with an available person, sitting cross-legged on a flat(ish) surface of some sort. Here we have DeLano sitting on a tatami mat, but you can choose a
floor, a futon, your bed… The upper body can be bound already, or you can bind the Kani
(translates as
The Crab
for the pose of the legs) portion of these ties, then tie the upper body before beginning the “Forced Bow” portion of the tie.
text/rope: Bridgett Harrington photography: Kenji model: DeLano N. Distress |
|
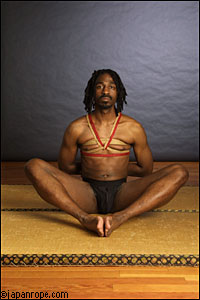
Step 2: Move them to where they are sitting with the flats of their feet together, but the rest of their pose is as if they were sitting cross-legged. You want approximately 8-14” of distance (depending on their size and flexibility) between their groin and their heels. If the person you are tying can not maintain this position for long, you can have them put one leg in this position (I begin by tying the left leg in this example), and their other leg is kept out straight until we are ready for it. |
|
Step 3: Find the bight (middle) of your rope, run the line around the outside of their mid-thigh and calf, and run the loose ends through the bight creating a lark’s head tie. |
|
Step 4: Run the line in the opposite direction around the calf and mid-thigh right next to the previous line. Run the loose ends through the loop that was created by the last turning of the line. Pull snug, but not uncomfortably so as you need to keep wrapping, and do not want the person you are tying to loose circulation, plus you will need a *bit* of room between the thigh and calf later on in finishing the Kani tie. |
|
Step 5: Run the line in the opposite direction around the mid-thigh and calf right next to the previous line. You now have three doubled lines around the folded leg. Run the loose ends through the loop that was created by the last turning of the line. Pull snug, evening out the tension between the three sets of lines. |
|
Step 6: Run the line in the opposite direction for a third time, creating a total of four doubled lines around the folded leg. Run the loose ends through the loop that was created by the last turning of the line. Pull snug to keep the tension even. This is the last turning around the outside of the legs, so at this point examine your wraps and make sure the lines lay directly next to one another and there are no major gaps between lines as these will cause discomfort after extended periods of time. |
|
Step 7: Your fourth line should have brought you right next to the inside of the knee. Run the loose ends of the rope through the bend in the knee, and out over the lines and under the leg. |
|
Step 8: Wrap the loose line around all four doubled lines that wrap around the leg, and pull it back around to the inside of the leg. |
|
Step 9: Tuck through the bend of the knee again, then around the back/outside of the legs, laying the line next to your first, and pull it back around, cinching the line. This will stop the rope from falling off the legs if the bound individual moves at all. |

|
Step 10: Tuck through the bend of the knee a third time, laying the line next to your first two. Pull tension even. |
|
Step 11: Pull the line back to the inside of the leg, and instead of running it through the bend of the knee again, pull the loose ends over, through and under some of the lines at the inside of the leg, thusly. Tie off with a simple knot of some sort. |
|
Step 12: Repeat the above steps with the other leg. |
|
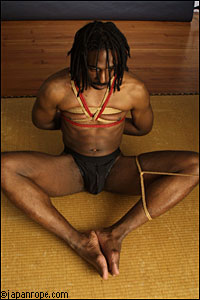
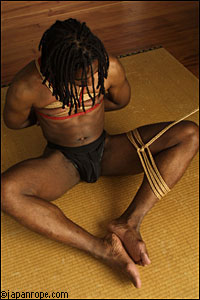
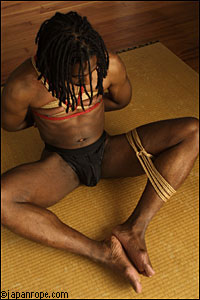
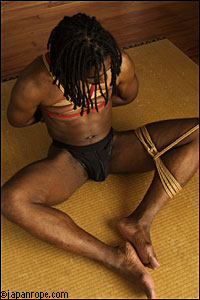
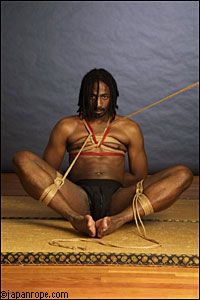
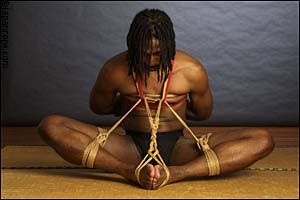
Step 13: Your finished Kani tie will look something like this. If you so choose, you can leave off here without the "Forced Bow." If the person has good knees and free hands, they can walk around on their knees to fetch things for you in this pose. The hands could be tied to each bent leg using the spare line. Or… get creative. |
|
Step 14:
But we are taking DeLano on with the Forced Bow. The Bow we are doing today is built for someone with an average back. If you are working with someone who
is incredibly flexible, pull lines tighter to compensate. If you are working with someone with a stiff back, scoliosis or other issues, talk to them ahead of
time about doing any poses like this.
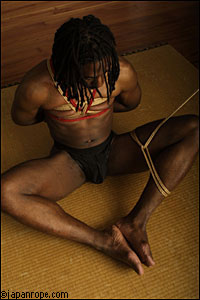
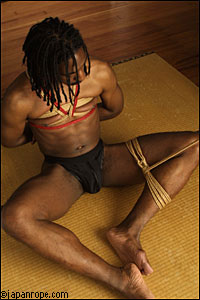
Run the loose ends from one leg tie up through the shoulder straps in front of that same side. Do the same with the other leg. |
|
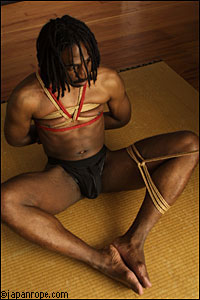
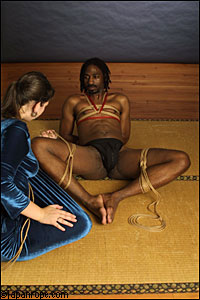
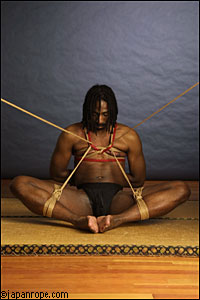
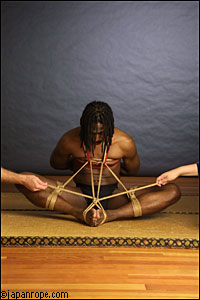
Step 15: You now have two sets of loose lines at the center of their chest. If you pull the lines out on each side, it will look vaguely like this. Instead of forcing them into a bow, you can choose to tie the person off with these lengths to overhead points. |
|
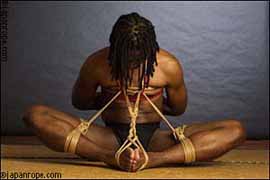
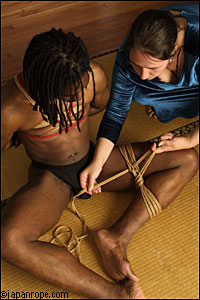
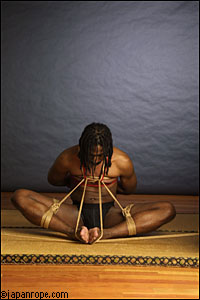
Step 16: Pull both lines down to the outside of each respective foot, wrap around to the other side of the feet, and pull their chest down towards their feet. Pull as far as you intend the finished pose to keep them. Yes, on very flexible individuals you can pull their chest down to touch their feet, but don’t push it, especially if you intend them to hold this pose for a very long time. |

|
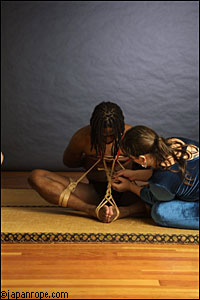
Step 17: Cross the lines up and over the feet. I usually sit directly in front of the person I am binding to do this, and thus have use of both my bands for doing this binding, but for the sake of photography we have employed a helping hand. |
|
Step 18: Wrap each loose end around the back of the shoulder-to-foot line and pull it forward. |
|
Step 19: Continue to wrap each of the loose ends around the back of the shoulder-to-foot line, pull it forward, then repeat. Keep going until you run out of rope. |
|
Step 20: Tie off with a square knot or whatever knot makes you happiest. |
|
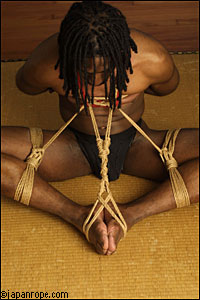
Step 21: From above the tie looks like this. You have finished the Kani- Forced Bow tie. If your partner is very flexible, the shoulder-to-foot line will be much shorter, to the point that their forehead may bow be resting on their feet. |
 Articles and Info
 Books
Books Contact
Us
Contact
Us Humor
Pages
Humor
Pages Links
Links Stories
 Training
 Welcome
Page
Welcome
Page