|
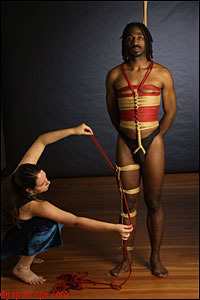
Step 1:
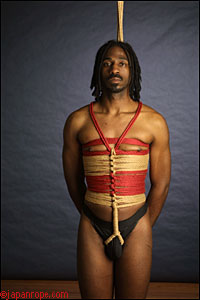
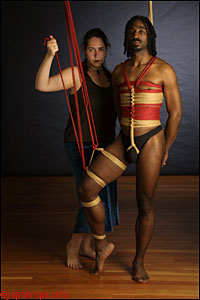
As this tie is a form of partial suspension, I highly suggest beginning with some form of overhead support line. This can be attached to a Shinju, Breast
Harness, or a Rope Corset (shown here). This will create a security line in case the model should lose their balance.
|
|
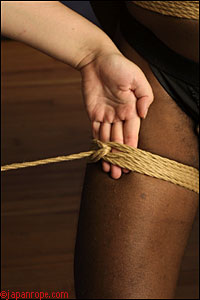
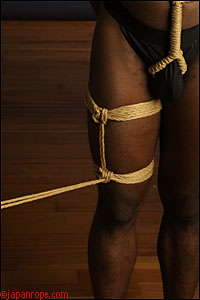
Step 2:
Make a bight by doubling a length of rope (25-30ft), and place it roughly at the middle front of the thigh. Run the loose ends of the rope through the bight.
|
|
Step 3:
Create tension by pulling the doubled line back the opposite direction.
|
|
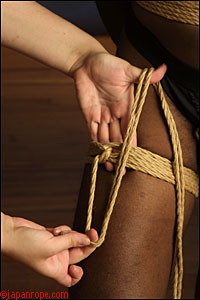
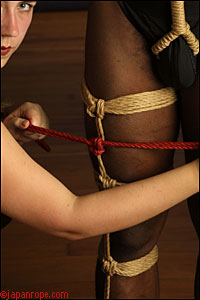
Step 4:
Wrap your loose ends around the back of the leg and return to the front. Pull the loose doubled ends through the new loop that was created by the last
wrapping of the lines. Pull back in the direction from which the lines came, evening out tension between all the wraps that have gone around the thigh.
|
|
Step 5:
Wrap the doubled lines a third time around the thigh, pulling through the next loop that was created. Once tension is even, make sure there is enough room
under the wrapped lines to barely fit 2-4 fingers snugly under the wraps. For larger individuals I suggest wrapping the lines a fourth time around the thigh
for better weight distribution.
|
|
Step 6:
Pull the loose doubled lines down and then up over the series of wraps around the thighs. This will loosely resemble the letter V.
|
|
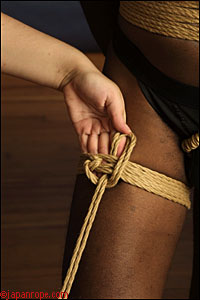
Step 7:
Pull the loose doubled ends under all of the wraps that go around the thighs, then over the bottom of the "V."
|
|
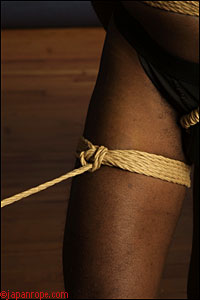
Step 8:
Pull the knot snug.
|
|
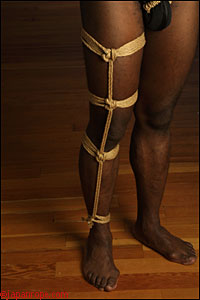
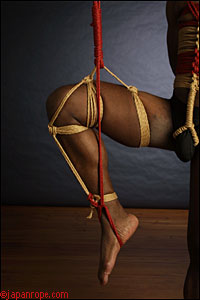
Step 9:
Repeat the above steps on a second tie located just above the knee.
|
|
Step 10:
Repeat the above steps on a third tie located below the knee.
|
|
Step 11:
Repeat the above steps on a fourth tie located around the ankle.
|
|
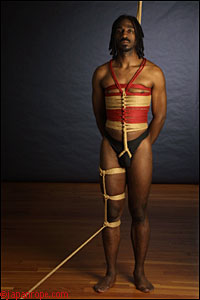
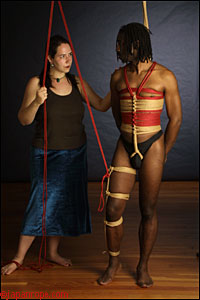
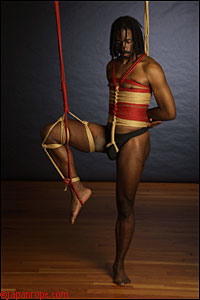
Step 12:
With these four sets of ties finished, the leg tie is finished. From here you have the option of using this to tie off into an Aosagi (which translates as the
"Heron" for it's one leg in the air pose,) or using the leg wrap to tie off to a piece of furniture, or another part of the body.
|
|
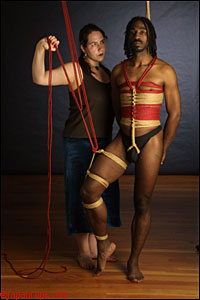
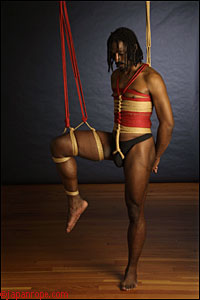
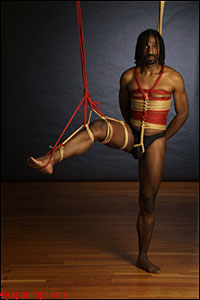
Step 13:
In this instance we will continue into an Aosagi pose, with DeLano pulled up onto his left foot. Take a doubled length of rope (25-30ft) and pull the bight under
the line that runs between the top and second set of lines on the leg wrap.
|
|
Step 14:
Tie a square knot over the line and pull tight.
|
|
Step 15:
Pull the loose ends of the doubled rope up through the overhead point and back down.
|
|
Step 16:
Pull the loose ends through the bight of the rope and back up creating tension on the line.
|
|
Step 17:
Pull the loose ends of the doubled line up through the overhead point again, back down underneath the line that runs between the second and third set of
wraps, and back up.
|

|
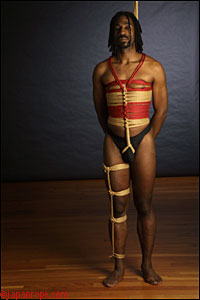
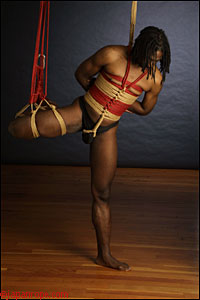
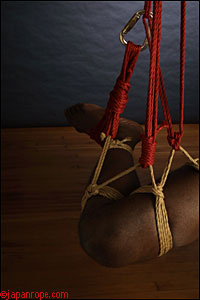
Step 18:
You have now created a form of pulley system. Use this pulley system to pull the leg up as far as you want it to be in the air. In this case I pull the
thigh and knee up perpendicular to the body.
|
|
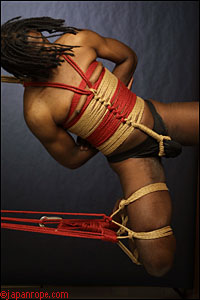
Step 19:
Tie off the loose end of the line by pulling back up to the overhead point or by tying off directly to the line. You have now finished the Aosagi pose.
There are many variations to this tie. Hit "next" and we'll give you a gallery of different poses that are possible with this tie.
|
|


 Articles and Info
 Books
Books Contact
Us
Contact
Us Humor
Pages
Humor
Pages Links
Links Stories
 Training
 Welcome
Page
Welcome
Page